Monday, December 7, 2015

Enemy Detection During a Custom MoveTo for Vehicles in Unreal Engine 4

Now that our vehicles can move themselves autonomously fairly well, we can have them check for enemies nearby during their travel.

Unreal 4 includes a new Environment Query System, which will do most of the work for us:

Like FindPathToLocation taking all the fun out of PathFinding...

The EQS Quick Start Guide does a fairly good job of walking through a sample setup, and we'll follow much of that for the first query.

Detecting Enemies

A query needs three objects: a context, a generator and tests.  The context represents "who": the perspective from which actor to perform the query.  The generator provides "what" or "where": the list of actors or locations to choose from.  Tests answer "why" items should be included or excluded from the list.

The default context is the "Querier": the actor performing the query.  We want to find enemies near the vehicle making the query, so no changes there.

Unreal provides several built in generators, and the closest to our needs is "Actors of Class".  However, that could also detect vehicles that are our allies so we need to build our own generator from EnvQueryGenerator_BlueprintBase.  We want to select from all vehicles, then filter out the vehicles that are our allies.

Clipped for readability...

Finally, we'll include the built-in tests: Distance and Trace on Visibility (to make sure it's not behind unreachable terrain).

The final query:


Note that we're providing a parameter (FindEnemyRadius) for the Distance query.  Also, don't be fooled by "prefer greater".  You can configure the test to use Inverse Linear scoring so that nearby objects score higher.

The EQS provides a handy Testing Pawn to check the results of the query during simulation.  It can show the scoring values as well as which tests failed on excluded items.

Calculating Controls to Aim

Assuming that our vehicle has front-mounted weapons, we need to tell it how to aim at a detected enemy.  Let's also assume that various vehicles may have short, medium or long-range weapons and will prefer different optimal ranges.  Our logic for aim is then:

  1. LineTraceByChannel from our vehicle to the enemy to determine if we can see our target (A defeated enemy or even our ally could be in the way.)
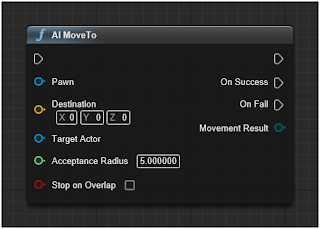
  2. If we can't see our target, drive to the LineOfFireLocation (More on that in a moment.)
  3. LineTraceByChannel from our forward direction to FindEnemyRadius to check if we're ready to fire
  4. If we're ready to fire and the target is in the optimal range, stop.  (And fire.)
  5. If the target is greater than our optimal range, speed up.
  6. If the target is less than our optimal range, reverse.
All this code to set Steering and Throttle...

Note that this is not the Pursuit behavior in Fernando Bevilacqua's excellent blog.  This is simply lining up the shot.  We'll build Pursuit behavior later when implementing explicit "attack this target" controls.

Finding LineOfSite Location

What if the enemy is in range, but we can't see it due to an obstacle?  (A defeated enemy or an ally mentioned earlier.)

We'll implement another Environment Query to find a location to fire from.  In this case, we need to create a custom Context because the perspective will be from the target, not our vehicle.  So the context needs to peek at the querier's properties to see who it's target is.

Since we have an optimal range we want to fire from, we'll use the built-in Donut generator to create a list of locations around our target within that range.  Then test to see which ones the target can see (and our vehicle could see from) and the closest of those to our vehicle:


That yields:


Challenges

I ran into two trouble spots with the EQS.

First, an Environment Query that has no result does not clear its Blackboard entry and set it to None.  It simply fails and moves on.  That inadvertently leaves the last detected enemy even when none are found.  So it was necessary to create a "Clear Found Enemy" task at the start of the Enemy Detection Sequence.

Second, the FindLineOfFire query would not return results when run from a Blueprint.  It worked just find from the Behavior Tree or the EQS Test Pawn.  It really belongs inside the vehicle's Blueprint, as the Behavior Tree should simply be saying "Attack This" then let it do it's thing.  So until that's resolved, it's temporarily in the Behavior Tree.

The Tree looks like this:

Ideally, each sequence would only have two tasks...

Here's what it looks like in action:


And yes it's finally time to apply some post-apocalyptic skins to the vehicles and attach some very loud guns...

Thursday, November 12, 2015

Collision Avoidance for Vehicles in Unreal Engine 4

Now that we can successfully select a group of vehicles and send them to a destination together, we've exposed another issue: they are blissfully unaware of each other and collide like a demolition derby.  Not a bad tactic against an enemy, but not helpful alongside your allies.

Collision Avoidance

Fernando Bevilacqua has a fantastic series on Understanding Steering Behaviors.  While his code generates forces on sprites and doesn't directly apply to our throttle/steering controls, the theory is still applicable.

One of the beautiful features of Fernando's approach is that all of his steering behaviors are cumulative and combine to create fluid motion.  We'll do the same by injecting a collision avoidance check after the vehicle calculates its navigation controls.  This means it will avoid collisions when necessary but will resume traveling toward its destination otherwise.

Based on Fernando's Collision Avoidance tutorial, we need to keep the following in mind:
  • Analyze the most threatening obstacle
  • Longer look-ahead length causes earlier reactions
  • Detect a potential collision
  • Apply an avoidance force
Fortunately, Unreal makes the first three easy to implement with LineTraceByChannel().

The scissors in Unreal's Swiss Army Knife.

Setting the End vector to some distance ahead will return a boolean if there's an obstacle.  I once again made use of GetForwardSpeed() as the look-ahead length for simplicity.  The faster the vehicle is traveling, the farther ahead it needs to check for obstacles to react to.

After experimentation, I projected two collision "sensors" on either side of the vehicle.  When only one is used, slight angle differences between nearby vehicles may not trace a hit yet still collide:

Looks almost like tracer fire from side-mounted weapons...

As for "applying an avoidance force", our limited control options of throttle or steering become a blessing in disguise as we're reduced to two options to react: slow down or turn away.

Slowing down was simple to implement: set the throttle to -1.  As soon as the obstacle is out of range, pathfinding resumes and they speed up again on their own.  While this did reduce the number of collisions, it also caused the vehicles to spread out into a long line.

Steering away was only slightly more complicated.  In this case, both sensors were necessary to decide which way to turn: away from the side closest to the detected collision.  Also an improved reduction of collisions, but they could be going too fast to avoid a collision despite turning.

So implementing both became necessary and avoided most collisions while keeping them relatively close together:

The collision counter at the top of the preview is with avoidance disabled...

Getting Unstuck

While we're injecting safety checks, there's another that's desperately needed: getting unstuck when rammed against a wall or another vehicle.

This was simply a series of branches, basically the same thing you would do actually driving:
  • If I'm not stuck, constantly reset a StuckTimer
  • If my throttle is not 0 but my velocity (nearly) is 0, then I could be stuck; watch the StuckTimer
  • If I'm still not moving after 1 second, set Throttle and Steering opposite to whatever I was doing
  • After 1 second of doing the opposite, I'm not stuck
Our AI routine still looks manageable:


Our vehicles are fairly autonomous, so the last thing to implement before "Guns!" is enemy detection.

Friday, October 16, 2015

Box Selecting Multiple Vehicles In Unreal Engine 4

We now have our top-down vehicle moving to a point-and-click destination, pathfinding, cornering and parking.  But one vehicle does not constitute a squad.

I created a hierarchy of structs to setup team compositions:
  • Match
    • Team[]
      • Player
      • Units[]
        • PawnClass
        • Active
        • Debug
        • Health
        • etc...
That struct is passed to a UnitManager which handles assigning the teams start locations and spawning units.

So far, fairly straight-forward.  To box select units with the mouse:
  1. Get the mouse X,Y position in the HUD with GetMousePosition
  2. As the mouse is moved, pass the start and end positions to the HUD
  3. On the HUD's ReceiveDrawHUD event, DrawLines representing the selection square

    Meanwhile...
     
  4. GetHitResultUnderCursorByChannel > BreakHitResult.HitActor cast to a vehicle unit gets a vehicle clicked on.  If the cast fails...
  5. GetHitResultUnderCursorByChannel > BreakHitResult.Location gets the mouse world location
  6. As the mouse is moved, pass the start and end locations to...
Here's where it gets tricky.  Initial instinct is to pass it to BoxOverlapActors.  That yields:


The problem is caused by the isometric camera perspective.  A square drawn on the UI is actually  trapezoidal in world space.  You can't rely on just two points.  You must pass all four UI positions to LineTraceByChannel to get the world position of each corner, which then represent the four planes of the trapezoid:


So how do you find the vehicles inside a polygon without a "PolygonOverlapActors"?  There's a simple trick.  Trace a ray outward from each vehicle and count the number of polygons it intersects using LinePlaneIntersection.  If it intersects two or none, it's outside.  If it only intersects one, it's inside:

I just added lasers to the vehicle weapon list.

We can now control a squad:


Next, we'll get them to be aware of each other and try to avoid colliding.  (And yes, it's almost time for guns!)

Friday, October 2, 2015

Parking Using a MoveTo Behavior For Vehicles In Unreal Engine 4

Buckle up, this one's going to involve some math.  To keep motivated, let's remind ourselves what the goal is:

Image from imdb.com
This is the view from the NPC.  Those would all be mine.

Parking in a specified direction involves two steps: the approach and the landing.

Parking, the Approach

We could just fling our vehicle directly at a destination and let it line itself up when it gets there.  However since there are 360 angles it could arrive at and 360 angles it could be destined for, it may spend quite some time turning around.  So ideally we want it as close as possible to its final rotation when it begins the landing.

To do that, we're going to inject a waypoint into the array of Path Points returned by the NavigationPath object.  We want to calculate a waypoint that is 90 to 180 degrees behind the destination.  If the vehicle is in front of the destination, it'll aim for 90 degrees to the side.  As the vehicle drives behind the destination, it will curve inward to 180 degrees directly behind the destination:

The similarity to aircraft landing is not lost on me.

The distance behind the destination (the yellow dotted line above) is determined by:

maxDistance * SIN( ABS( DeltaAngleFromNextNavToFinalRotation ) * 0.5 )

I chose 1500 for maxDistance, as longer distances makes the vehicle appear to veer way off course and shorter distances didn't give it enough length to line up behind it.

The direction from the destination to insert the waypoint (the orange dotted line above) is:

COS( DeltaAngleFromNextNavToFinalRotation * 0.333 ) * SIGN( DeltaAngleFromNextNavToFinalRotation ) * -180

The result is a rotator from 90 to 180 degrees, to be added to the final rotation.  The numbers work out like this:

AngleRotatorLength
-18090.11
-150115.80.96
-120137.90.86
-90155.90.70
-60169.1 0.5
-30177.2 0.25
00 0
30-177.20.25
60-169.1 0.5
90-155.9 0.70
120-137.90.86
150-115.80.96
180-90.11

Here's the blueprint:


Parking, the Landing

Once the vehicle is likely behind the destination, probably facing nearly the correct direction, and within CloseEnough(), we can start actually parking.

The primary goal is to align the vehicle along the rotation plane that passes through the destination.  That's the hard part.  Then it's a simple matter to forward or reverse to the destination.

We need to calculate a target to steer toward again, but unlike the Approach target, the Landing target will always be in a line along the rotation plane.  The farther to the side the vehicle is, the straighter it will aim directly for the plane.  As it gets closer, it will steer to drive alongside it:

I would have been more interested in trigonometry if the problems were like this instead of the height of trees.

We need three values: how far the vehicle is along the plane, its distance away from the plane and whether the vehicle is facing toward or away from it.

We know how far the vehicle is along the plane (the yellow line above) using:

COS( DeltaAngleFromFinalRotationToVehicle ) * DistanceFromDestinationToVehicle

And its distance away from the plane (the orange dotted line above) with:

SIN( DeltaAngleFromFinalRotationToVehicle ) * DistanceFromDestinationToVehicle

We can tell if the vehicle is aimed toward or away from the plane by:

SIGN( DeltaBetweenFinalRotationAndVehiclesRotation ) *
SIGN( DOTPRODUCT( DestinationRightVector, VehicleRightVector ) )

That results in a 1 or -1 describing whether the vehicle is aiming left or right of the destination and which side of the plane it's on.  That becomes the vehicle's throttle.

Finally, we can calculate an exponentially increasing length away from the vehicle's position along the plane:

ABS( ( 1 - ( CloseEnough / ABS( DistanceFromPlane ) ) ) * DistanceAlongPlane ) * Throttle + DistanceAlongPlane

The blueprints:

You said THREE values?!

Will it fit like a glove?  Probably not.  Could wasteland warriors use it to setup an ambush?  Absolutely:


The logic still isn't too complicated yet:

Next time, we'll spawn multiple vehicles and handle group selection.

Friday, September 18, 2015

Improved MoveTo Behavior For Vehicles In Unreal Engine 4


After the previous post, we now have rudimentary MoveTo functionality for WheeledVehicle pawns.  However, locking the throttle axis at 1.0 causes some obvious problems steering around corners.

Before we tackle that, let's at least stop the vehicle when it reaches its destination.

Close Enough

I added a CloseEnough float variable to the unit, then compared it to the distance to the last NavPoint[] inside a CalculateThrottle() function.  If it's close enough, we'll set the vehicle's state to "Parking".

Yes, state machines are out of fashion and behavior trees have obvious advantages.  At first, I did build quite a bit of control logic inside the behavior tree.  Yet as I continuously added variables to the Blackboard I realized I would then need multiple behavior trees: one for each type of unit.  A helicopter would need vastly different controls.  I would have duplicate trees (or extensive Switches) despite having very similar behaviors.

I think there's still room for both, and a mix of the two is needed here.  The Behavior tree will generally define what the unit should be doing (navigating, following, attacking...) while the unit itself implements how to do it -- including how to stop doing it.

So in this case, the Behavior Tree asks "Am I Driving?" (Driving is the state set when MoveTo is called.)  If so, find a path.  The vehicle itself determines how it gets there.  When the answer is no, the Behavior Tree will "idle" until it's given a new direction.  When Parking, the vehicle sets the throttle to 0 and enables the handbrake.

Improved Throttling

At first, I approached cornering as a math problem and tried physics calculations to determine control settings around a corner.  After numerous failures, it struck me that I don't calculate any of that in my head when I drive my own car.

So I enabled possession of a unit and had it drop pylons every time I changed a control.

Also recording steering: Not as useful

While I always steer toward my next immediate goal, throttle is determined by a future guess as to where the vehicle be and what direction it will be facing.  Despite steering straight for the corner, I stop accelerating to prepare for the turn.  Once in the turn, if I'm going too fast and not facing my next goal then I apply the handbrake and throttle to force a tighter turn.

I chose to predict the position of the car after one second, purely because it was easy to use GetForwardSpeed() and apply that to the forward vector.

Armed with those few rules, the logic is actually quite simple:

If the next NavPoint past the predicted distance is NavPoint[1], throttle = 1


If steering is straight but the angle to the predicted NavPoint is increasing, throttle = 0


If steering is not straight and angle is greater than 90, apply handbrake and throttle = 1


Navigation has been recalculated, it has a straight line to the first point NavPoint[1],
throttle = 1

Will it beat the player in a speed race?  Probably not.  Is it sufficient to simulate fearless post-apocalyptic survivors?  Surprisingly so:


The logic now looks like:


Spline Paths

You'll notice that the rendered path (the green lines) expresses curves because I'm using a SplineComponent to connect the NavPoints.  Let me save you some trouble lest you attempt to guide the vehicle with a spline or use it to predict the vehicle's position.

You can't specify the rotation of individual SplineComponent points.  If you watch carefully in the videos or screenshots, you'll sometimes see exaggerated curves between some points as their rotations do not necessarily aim toward each other.

While the SplineComponent provides a very handy GetLocationAtDistanceAlongSpline() function, there is a significant amount of bookkeeping required to calculate that effectively as well as the curves mentioned above distorting the results.  I found it much simpler to sum up the NavPoint segment lengths and check if my predicted distance is greater.

Next, we'll improve parking so that the vehicle stops at its destination facing a specified direction.

Friday, September 4, 2015

Basic MoveTo Behavior For Vehicles In Unreal Engine 4

Baldur's Gate, MechCommander, Neverwinter Nights, Dragon Age: Origins and Pillars of Eternity: games featuring squad-level real-time with pause tactical gameplay.  Those beloved franchises balance a mix of RPG micromanagement and battlefield strategy, but there's a void. 

As a fan of Car Wars, The Road WarriorSpy Hunter and Death Race, I want to arm and armor a squad of post-apocalyptic muscle cars then send them into the wasteland to challenge gangs of jury-rigged monstrosities-on-wheels fighting over gasoline and spare parts.

Image from imdb.com
This.  A screen full of this.

Engines like Unreal (and Unity) are available for free and it's easier than ever for inexperienced developers to create games.  With no eagerly anticipated announcements forthcoming, like any smug mature gamer with a programming background I thought, "How hard could it be?"

As we're going to find out, fairly hard.

"Simple" Vehicle Movement

The first feature to tackle is point-and-click movement.  Instead of directly controlling a single vehicle, we want a squad of vehicles to drive themselves to a specified destination.

I assumed it would be as simple as importing a vehicle from one of the examples, build a Behavior Tree Task and send it a MoveTo.

Done.  Next on the list?  Guns!

Except that pawns using the WheeledVehicleMovement component don't respond to MoveTo.  They respond to Throttle, Steering and Handbrake.  So not only do we have to tell it where to go, but how to get there.

The typical approach to racing game AI is to pre-build waypoints into a circular track.  That won't work for this game due to the open-world style maps.  We need to tell a vehicle to move from anywhere to anywhere.  Fortunately, we can still use Unreal's NavMesh intended for character pawns.  The FindPathToLocationSynchronously function simply needs Start and End vectors.  The result is a NavigationPath object, which includes an array of Path Point vectors.

Who says A* Pathfinding is complicated?

Now we can build a short Behavior Tree Service that recalculates a path from the vehicle's location to its destination.  Finally, have the vehicle always steer toward the next waypoint, NavPoints[1], and set the throttle to 1.0 (for now).  Our logic so far looks like:

I thought you said this was hard?

Here's what it looks like in-game:


Next time, we'll make the throttle smarter and make use of the handbrake.


Sunday, June 26, 2011

D&D BattleMap Using the UDK – Transitions, Menus and Config Files

The UI for our placeable object commands isn’t quite ready yet (it seems everyone’s suddenly a critic), but this post we’ll introduce similar concepts while implementing another desperately needed feature: transitioning between maps.  I’m getting a little tired of having to close down the UDK and reconfiguring the Unreal FrontEnd just to change maps:


We’ll provide the option to choose a map with a flyout menu built in Flash.  But to achieve our objective of keeping the maps independent of the BattleMap mod, we can’t hard code the map list into the menu.  Therefore, we’ll store the list in a config file and pass it to the HUD on startup.

Flash

Once again, our friends at MonsterLayer.com produced some gorgeous assets for us in an astonishingly short amount of time.  I’ll do my best to break down how they built our menu, but you can certainly create any style of menu that suits you.  All that’s important is that the asset names match the code.

Below is a snapshot of an individual menu button.  This will be duplicated multiple times: one for each map.

The “Scripts” layer simply contains:
stop();
The second frame of the background later changes the color.  That will become the “hover” when moused over.  (Yes, Flash does include a Button type.  However, we had multiple issues trying to get it to work correctly so we went with the programmer’s approach of just coding it ourselves.)

Make sure the Text object is named “ButtonText” and save the symbol as a MovieClip named “MapButton”.

Create another button the exact same way:

Name this MovieClip “CloseButton”.

Next, create a menu that contains your button objects:

Name the map button instances “MapButton0”, “MapButton1”, etc.  Name the close button instance “CloseButton”.  Save this MovieClip as “MapList”.

Create another MovieClip called “MapListMenu”.  Add an instance of MapList named “MapListInst”.  Create a motion tween of it moving onto the stage:

The scripts on the 1st and last frames both simply contain:
stop();
Now, add an instance of MapListMenu to your root movie named “MapListMenuInst”.  Position it so that it starts outside the scene, but ends inside at the end of its animation.  (Edit In Place comes in real handy here.)

We need one more object.  Transitioning between maps can take a few seconds to initiate.  We should provide a visual clue that the transition has begun and the UDK isn’t hung.  Create an object named “Overlay”.  I drew a giant semi-transparent background with the ever-polite instructions “Please Wait…”:

Add an instance of your Overlay object to your root movie as “OverlayInst”.

ActionScript

Now, we need to wire it all up.  Add the following to your root ActionScript.  It initializes an array to store the map list, hides the Overlay and sets up mouse events for the buttons.  The click event for the map buttons will show the Overlay on top, toggle off the menu and pass the chosen map back to UnrealScript:
var Maps:Array;
// Hide overlay
OverlayInst._visible = false;

// Init map buttons
i=0;
while(MapListMenuInst.MapListInst["MapButton"+i])
{
 MapListMenuInst.MapListInst["MapButton"+i]._visible = false;
 MapListMenuInst.MapListInst["MapButton"+i].onRollOver = function(){
  this.gotoAndStop(2);
 }
 MapListMenuInst.MapListInst["MapButton"+i].onRollOut = function(){
  this.gotoAndStop(1);
 }
 MapListMenuInst.MapListInst["MapButton"+i].onRelease = function(){
  OverlayInst.swapDepths(_root.getNextHighestDepth());
  OverlayInst._visible = true;
  ShowMapList();
  ExternalInterface.call( "OpenMap", Maps[this._name.substr(9)]["File"] );
 }
 i++;
}

// Init close button
MapListMenuInst.MapListInst.CloseButton.onRollOver = function(){
 this.gotoAndStop(2);
}
MapListMenuInst.MapListInst.CloseButton.onRollOut = function(){
 this.gotoAndStop(1);
}
MapListMenuInst.MapListInst.CloseButton.onRelease = function(){
 ExternalInterface.call( "CloseMap" );
}
Next, add the following InitMapList() function.  This will be called by UnrealScript to pass in the map list and setup the map buttons:
function InitMapList(Param1:Array)
{
 Maps = Param1;

 //Show only buttons with maps
 for (i=0; i<Maps.length; i++)
 {
  MapListMenuInst.MapListInst["MapButton"+i].ButtonText.text = Maps[i]["Name"];
  MapListMenuInst.MapListInst["MapButton"+i]._visible = true;
 }
}
Finally, add the ShowMapList() function to toggle the menu on/off:
function ShowMapList()
{
 if (MapListMenuInst._currentframe == 1)
 {
  MapListMenuInst.swapDepths(_root.getNextHighestDepth());
  CursorInst.swapDepths(_root.getNextHighestDepth());
  MapListMenuInst.gotoAndPlay(2);
 }
 else
  MapListMenuInst.gotoAndStop(1);
}
Republish the .swf file then open up the UDK, find the BattleMapHud package, and reimport BMHud.

BattleMapConfig.uc

Now, let’s setup a config file to store the map names.  The UDK builds in configuration file functionality into the base Object class.   That means that every class can implement its own config file.  Mougli’s portfolio includes a very good tutorial on UDK configuration files.  To sum up, any variable declared globally in a class becomes an entry in its config file.

Here’s the code for a simple object containing an array of MapItem structs:
class BattleMapConfig extends Object config(BattleMap);
struct MapItem
{
 var config string Name;
 var config string File;
};

var config array <MapItem> Maps;
The “config(BattleMap)” directive tells the UDK that this object will read and write to a BattleMap.ini file.

DefaultBattleMap.ini

In your /UDKGame/Config directory, create a new .ini file called “DefaultBattleMap.ini” and enter the titles and file names of your maps.  For example, mine looks like:
[BattleMap.BattleMapConfig]
Maps=(Name="Demon Queen's Enclave U1, L1",File="BM_DemonQueensEnclave.udk")
Maps=(Name="Demon Queen's Enclave L13-16",File="BM_DemonQueensEnclave1.udk")
Maps=(Name="Demon Queen's Enclave L2-6,11,V1",File="BM_DemonQueensEnclave2.udk")
Maps=(Name="Demon Queen's Enclave V2,V4-V10",File="BM_DemonQueensEnclave3.udk")
Maps=(Name="Demon Queen's Enclave V12",File="BM_DemonQueensEnclave4.udk")
The format should look very familiar, it’s similar to DefaultInput.ini where we include new key bindings.  Notice that the section heading is the name of our class.

DefaultInput.ini

Speaking of DefaultInput.ini, while we’re here go ahead and add a key binding to toggle our menu:
-Bindings=(Name="Escape",Command="GBA_ShowMenu")
.Bindings=(Name="Escape",Command="BMShowMapList")
(In case you’re curious, the period in front of .Bindings means that duplicate entries are allowed.)

BattleMapPlayerController.uc

Here, we simply need to instantiate our new BattleMapConfig class, which will cause it to automatically initialize its variables from the config file:
var BattleMapConfig BMConfig;
simulated function PostBeginPlay()
{
 super.PostBeginPlay();
 BMConfig = new class'BattleMapConfig';
}
BattleMapHUD.uc

Inside PostBeginPlay(), add a call to a CallInitMapList() function right after the CrosshairMovie.Initialize() statement and pass in the newly loaded Map array:
  CrosshairMovie.CallInitMapList(BattleMapPlayerController(PlayerOwner).BMConfig.Maps);
BattleMapPlayerInput.uc

Create a new command to tell the HUD to toggle the menu and another to tell the UDK to load a new map:
exec function BMShowMapList()
{
 if (WorldInfo.NetMode == NM_Standalone || WorldInfo.NetMode == NM_ListenServer)
 {
  BattleMapHUD(myHUD).CrossHairMovie.CallShowMapList();
 }
}

exec function BMOpenMap(string MapFile)
{
 WorldInfo.Game.ProcessServerTravel(MapFile);
}
BattleMapGfxHud.uc

First, create two new wrapper functions for calling the HUD’s InitMapList() and ShowMapList():
function CallInitMapList( array <MapItem> Param1 )
{
 ActionScriptVoid("InitMapList");
}

function CallShowMapList()
{
 ActionScriptVoid("ShowMapList");
}
Finally, create two receiver functions called by the HUD to execute our BMOpenMap() command and the Quit command:
function OpenMap(string MapFile)
{
 ConsoleCommand("BMOpenMap " @ MapFile);
}

function CloseMap()
{
 ConsoleCommand("Quit");
}
That’s it!  If everything went smoothly, hitting Esc will now pop up a menu of map choices.  Clicking on a map name will transition to a new map.  Clicking the close button will cleanly exit the UDK.

BattleMap mode source files