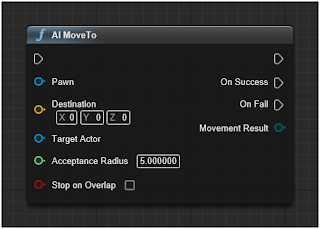
Like FindPathToLocation taking all the fun out of PathFinding...
The EQS Quick Start Guide does a fairly good job of walking through a sample setup, and we'll follow much of that for the first query.
Detecting Enemies
A query needs three objects: a context, a generator and tests. The context represents "who": the perspective from which actor to perform the query. The generator provides "what" or "where": the list of actors or locations to choose from. Tests answer "why" items should be included or excluded from the list.
The default context is the "Querier": the actor performing the query. We want to find enemies near the vehicle making the query, so no changes there.
Unreal provides several built in generators, and the closest to our needs is "Actors of Class". However, that could also detect vehicles that are our allies so we need to build our own generator from EnvQueryGenerator_BlueprintBase. We want to select from all vehicles, then filter out the vehicles that are our allies.
Clipped for readability...
Finally, we'll include the built-in tests: Distance and Trace on Visibility (to make sure it's not behind unreachable terrain).
The final query:
Note that we're providing a parameter (FindEnemyRadius) for the Distance query. Also, don't be fooled by "prefer greater". You can configure the test to use Inverse Linear scoring so that nearby objects score higher.
The EQS provides a handy Testing Pawn to check the results of the query during simulation. It can show the scoring values as well as which tests failed on excluded items.
Calculating Controls to Aim
Assuming that our vehicle has front-mounted weapons, we need to tell it how to aim at a detected enemy. Let's also assume that various vehicles may have short, medium or long-range weapons and will prefer different optimal ranges. Our logic for aim is then:
LineTraceByChannel from our vehicle to the enemy to determine if we can see our target (A defeated enemy or even our ally could be in the way.)
If we can't see our target, drive to the LineOfFireLocation (More on that in a moment.)
LineTraceByChannel from our forward direction to FindEnemyRadius to check if we're ready to fire
If we're ready to fire and the target is in the optimal range, stop. (And fire.)
If the target is greater than our optimal range, speed up.
If the target is less than our optimal range, reverse.
All this code to set Steering and Throttle...
Note that this is not the Pursuit behavior in Fernando Bevilacqua's excellent blog. This is simply lining up the shot. We'll build Pursuit behavior later when implementing explicit "attack this target" controls.
Finding LineOfSite Location
What if the enemy is in range, but we can't see it due to an obstacle? (A defeated enemy or an ally mentioned earlier.)
We'll implement another Environment Query to find a location to fire from. In this case, we need to create a custom Context because the perspective will be from the target, not our vehicle. So the context needs to peek at the querier's properties to see who it's target is.
Since we have an optimal range we want to fire from, we'll use the built-in Donut generator to create a list of locations around our target within that range. Then test to see which ones the target can see (and our vehicle could see from) and the closest of those to our vehicle:
That yields:
Challenges
I ran into two trouble spots with the EQS.
First, an Environment Query that has no result does not clear its Blackboard entry and set it to None. It simply fails and moves on. That inadvertently leaves the last detected enemy even when none are found. So it was necessary to create a "Clear Found Enemy" task at the start of the Enemy Detection Sequence.
Second, the FindLineOfFire query would not return results when run from a Blueprint. It worked just find from the Behavior Tree or the EQS Test Pawn. It really belongs inside the vehicle's Blueprint, as the Behavior Tree should simply be saying "Attack This" then let it do it's thing. So until that's resolved, it's temporarily in the Behavior Tree.
The Tree looks like this:
Ideally, each sequence would only have two tasks...
Here's what it looks like in action:
And yes it's finally time to apply some post-apocalyptic skins to the vehicles and attach some very loud guns...
Now that we can successfully select a group of vehicles and send them to a destination together, we've exposed another issue: they are blissfully unaware of each other and collide like a demolition derby. Not a bad tactic against an enemy, but not helpful alongside your allies.
Collision Avoidance
Fernando Bevilacqua has a fantastic series on Understanding Steering Behaviors. While his code generates forces on sprites and doesn't directly apply to our throttle/steering controls, the theory is still applicable.
One of the beautiful features of Fernando's approach is that all of his steering behaviors are cumulative and combine to create fluid motion. We'll do the same by injecting a collision avoidance check after the vehicle calculates its navigation controls. This means it will avoid collisions when necessary but will resume traveling toward its destination otherwise.
Based on Fernando's Collision Avoidance tutorial, we need to keep the following in mind:
Analyze the most threatening obstacle
Longer look-ahead length causes earlier reactions
Detect a potential collision
Apply an avoidance force
Fortunately, Unreal makes the first three easy to implement with LineTraceByChannel().
Setting the End vector to some distance ahead will return a boolean if there's an obstacle. I once again made use of GetForwardSpeed() as the look-ahead length for simplicity. The faster the vehicle is traveling, the farther ahead it needs to check for obstacles to react to.
After experimentation, I projected two collision "sensors" on either side of the vehicle. When only one is used, slight angle differences between nearby vehicles may not trace a hit yet still collide:
Looks almost like tracer fire from side-mounted weapons...
As for "applying an avoidance force", our limited control options of throttle or steering become a blessing in disguise as we're reduced to two options to react: slow down or turn away.
Slowing down was simple to implement: set the throttle to -1. As soon as the obstacle is out of range, pathfinding resumes and they speed up again on their own. While this did reduce the number of collisions, it also caused the vehicles to spread out into a long line.
Steering away was only slightly more complicated. In this case, both sensors were necessary to decide which way to turn: away from the side closest to the detected collision. Also an improved reduction of collisions, but they could be going too fast to avoid a collision despite turning.
So implementing both became necessary and avoided most collisions while keeping them relatively close together:
The collision counter at the top of the preview is with avoidance disabled...
Getting Unstuck
While we're injecting safety checks, there's another that's desperately needed: getting unstuck when rammed against a wall or another vehicle.
This was simply a series of branches, basically the same thing you would do actually driving:
If I'm not stuck, constantly reset a StuckTimer
If my throttle is not 0 but my velocity (nearly) is 0, then I could be stuck; watch the StuckTimer
If I'm still not moving after 1 second, set Throttle and Steering opposite to whatever I was doing
After 1 second of doing the opposite, I'm not stuck
Our AI routine still looks manageable:
Our vehicles are fairly autonomous, so the last thing to implement before "Guns!" is enemy detection.
The problem is caused by the isometric camera perspective. A square drawn on the UI is actually trapezoidal in world space. You can't rely on just two points. You must pass all four UI positions to LineTraceByChannel to get the world position of each corner, which then represent the four planes of the trapezoid:
So how do you find the vehicles inside a polygon without a "PolygonOverlapActors"? There's a simple trick. Trace a ray outward from each vehicle and count the number of polygons it intersects using LinePlaneIntersection. If it intersects two or none, it's outside. If it only intersects one, it's inside:
I just added lasers to the vehicle weapon list.
We can now control a squad:
Next, we'll get them to be aware of each other and try to avoid colliding. (And yes, it's almost time for guns!)
This is the view from the NPC. Those would all be mine.
Parking in a specified direction involves two steps: the approach and the landing.
Parking, the Approach
We could just fling our vehicle directly at a destination and let it line itself up when it gets there. However since there are 360 angles it could arrive at and 360 angles it could be destined for, it may spend quite some time turning around. So ideally we want it as close as possible to its final rotation when it begins the landing.
To do that, we're going to inject a waypoint into the array of Path Points returned by the NavigationPath object. We want to calculate a waypoint that is 90 to 180 degrees behind the destination. If the vehicle is in front of the destination, it'll aim for 90 degrees to the side. As the vehicle drives behind the destination, it will curve inward to 180 degrees directly behind the destination:
The similarity to aircraft landing is not lost on me.
The distance behind the destination (the yellow dotted line above) is determined by:
I chose 1500 for maxDistance, as longer distances makes the vehicle appear to veer way off course and shorter distances didn't give it enough length to line up behind it.
The direction from the destination to insert the waypoint (the orange dotted line above) is:
The result is a rotator from 90 to 180 degrees, to be added to the final rotation. The numbers work out like this:
Angle
Rotator
Length
-180
90.1
1
-150
115.8
0.96
-120
137.9
0.86
-90
155.9
0.70
-60
169.1
0.5
-30
177.2
0.25
0
0
0
30
-177.2
0.25
60
-169.1
0.5
90
-155.9
0.70
120
-137.9
0.86
150
-115.8
0.96
180
-90.1
1
Here's the blueprint:
Parking, the Landing
Once the vehicle is likely behind the destination, probably facing nearly the correct direction, and within CloseEnough(), we can start actually parking.
The primary goal is to align the vehicle along the rotation plane that passes through the destination. That's the hard part. Then it's a simple matter to forward or reverse to the destination.
We need to calculate a target to steer toward again, but unlike the Approach target, the Landing target will always be in a line along the rotation plane. The farther to the side the vehicle is, the straighter it will aim directly for the plane. As it gets closer, it will steer to drive alongside it:
I would have been more interested in trigonometry if the problems were like this instead of the height of trees.
We need three values: how far the vehicle is along the plane, its distance away from the plane and whether the vehicle is facing toward or away from it.
We know how far the vehicle is along the plane (the yellow line above) using:
That results in a 1 or -1 describing whether the vehicle is aiming left or right of the destination and which side of the plane it's on. That becomes the vehicle's throttle.
Finally, we can calculate an exponentially increasing length away from the vehicle's position along the plane:
After the previous post, we now have rudimentary MoveTo functionality for WheeledVehicle pawns. However, locking the throttle axis at 1.0 causes some obvious problems steering around corners.
Before we tackle that, let's at least stop the vehicle when it reaches its destination.
Close Enough
I added a CloseEnough float variable to the unit, then compared it to the distance to the last NavPoint[] inside a CalculateThrottle() function. If it's close enough, we'll set the vehicle's state to "Parking".
Yes, state machines are out of fashion and behavior trees have obvious advantages. At first, I did build quite a bit of control logic inside the behavior tree. Yet as I continuously added variables to the Blackboard I realized I would then need multiple behavior trees: one for each type of unit. A helicopter would need vastly different controls. I would have duplicate trees (or extensive Switches) despite having very similar behaviors.
I think there's still room for both, and a mix of the two is needed here. The Behavior tree will generally define what the unit should be doing (navigating, following, attacking...) while the unit itself implements how to do it -- including how to stop doing it.
So in this case, the Behavior Tree asks "Am I Driving?" (Driving is the state set when MoveTo is called.) If so, find a path. The vehicle itself determines how it gets there. When the answer is no, the Behavior Tree will "idle" until it's given a new direction. When Parking, the vehicle sets the throttle to 0 and enables the handbrake.
Improved Throttling
At first, I approached cornering as a math problem and tried physics calculations to determine control settings around a corner. After numerous failures, it struck me that I don't calculate any of that in my head when I drive my own car.
So I enabled possession of a unit and had it drop pylons every time I changed a control.
Also recording steering: Not as useful
While I always steer toward my next immediate goal, throttle is determined by a future guess as to where the vehicle be and what direction it will be facing. Despite steering straight for the corner, I stop accelerating to prepare for the turn. Once in the turn, if I'm going too fast and not facing my next goal then I apply the handbrake and throttle to force a tighter turn.
I chose to predict the position of the car after one second, purely because it was easy to use GetForwardSpeed() and apply that to the forward vector.
Armed with those few rules, the logic is actually quite simple:
If the next NavPoint past the predicted distance is NavPoint[1], throttle = 1
If steering is straight but the angle to the predicted NavPoint is increasing, throttle = 0
If steering is not straight and angle is greater than 90, apply handbrake and throttle = 1
Navigation has been recalculated, it has a straight line to the first point NavPoint[1],
throttle = 1
Will it beat the player in a speed race? Probably not. Is it sufficient to simulate fearless post-apocalyptic survivors? Surprisingly so:
The logic now looks like:
Spline Paths
You'll notice that the rendered path (the green lines) expresses curves because I'm using a SplineComponent to connect the NavPoints. Let me save you some trouble lest you attempt to guide the vehicle with a spline or use it to predict the vehicle's position.
You can't specify the rotation of individual SplineComponent points. If you watch carefully in the videos or screenshots, you'll sometimes see exaggerated curves between some points as their rotations do not necessarily aim toward each other.
While the SplineComponent provides a very handy GetLocationAtDistanceAlongSpline() function, there is a significant amount of bookkeeping required to calculate that effectively as well as the curves mentioned above distorting the results. I found it much simpler to sum up the NavPoint segment lengths and check if my predicted distance is greater.
Next, we'll improve parking so that the vehicle stops at its destination facing a specified direction.
As a fan of Car Wars, The Road Warrior, Spy Hunter and Death Race, I want to arm and armor a squad of post-apocalyptic muscle cars then send them into the wasteland to challenge gangs of jury-rigged monstrosities-on-wheels fighting over gasoline and spare parts.
Engines like Unreal (and Unity) are available for free and it's easier than ever for inexperienced developers to create games. With no eagerly anticipated announcements forthcoming, like any smug mature gamer with a programming background I thought, "How hard could it be?"
As we're going to find out, fairly hard.
"Simple" Vehicle Movement
The first feature to tackle is point-and-click movement. Instead of directly controlling a single vehicle, we want a squad of vehicles to drive themselves to a specified destination.
I assumed it would be as simple as importing a vehicle from one of the examples, build a Behavior Tree Task and send it a MoveTo.
Done. Next on the list? Guns!
Except that pawns using the WheeledVehicleMovement component don't respond to MoveTo. They respond to Throttle, Steering and Handbrake. So not only do we have to tell it where to go, but how to get there.
The typical approach to racing game AI is to pre-build waypoints into a circular track. That won't work for this game due to the open-world style maps. We need to tell a vehicle to move from anywhere to anywhere. Fortunately, we can still use Unreal's NavMesh intended for character pawns. The FindPathToLocationSynchronously function simply needs Start and End vectors. The result is a NavigationPath object, which includes an array of Path Point vectors.
Who says A* Pathfinding is complicated?
Now we can build a short Behavior Tree Service that recalculates a path from the vehicle's location to its destination. Finally, have the vehicle always steer toward the next waypoint, NavPoints[1], and set the throttle to 1.0 (for now). Our logic so far looks like:
I thought you said this was hard?
Here's what it looks like in-game:
Next time, we'll make the throttle smarter and make use of the handbrake.
The UI for our placeable object commands isn’t quite ready yet (it seems everyone’s suddenly a critic), but this post we’ll introduce similar concepts while implementing another desperately needed feature: transitioning between maps. I’m getting a little tired of having to close down the UDK and reconfiguring the Unreal FrontEnd just to change maps:
We’ll provide the option to choose a map with a flyout menu built in Flash. But to achieve our objective of keeping the maps independent of the BattleMap mod, we can’t hard code the map list into the menu. Therefore, we’ll store the list in a config file and pass it to the HUD on startup.
Flash
Once again, our friends at MonsterLayer.com produced some gorgeous assets for us in an astonishingly short amount of time. I’ll do my best to break down how they built our menu, but you can certainly create any style of menu that suits you. All that’s important is that the asset names match the code.
Below is a snapshot of an individual menu button. This will be duplicated multiple times: one for each map.
The “Scripts” layer simply contains:
stop();
The second frame of the background later changes the color. That will become the “hover” when moused over. (Yes, Flash does include a Button type. However, we had multiple issues trying to get it to work correctly so we went with the programmer’s approach of just coding it ourselves.)
Make sure the Text object is named “ButtonText” and save the symbol as a MovieClip named “MapButton”.
Create another button the exact same way:
Name this MovieClip “CloseButton”.
Next, create a menu that contains your button objects:
Name the map button instances “MapButton0”, “MapButton1”, etc. Name the close button instance “CloseButton”. Save this MovieClip as “MapList”.
Create another MovieClip called “MapListMenu”. Add an instance of MapList named “MapListInst”. Create a motion tween of it moving onto the stage:
The scripts on the 1st and last frames both simply contain:
stop();
Now, add an instance of MapListMenu to your root movie named “MapListMenuInst”. Position it so that it starts outside the scene, but ends inside at the end of its animation. (Edit In Place comes in real handy here.)
We need one more object. Transitioning between maps can take a few seconds to initiate. We should provide a visual clue that the transition has begun and the UDK isn’t hung. Create an object named “Overlay”. I drew a giant semi-transparent background with the ever-polite instructions “Please Wait…”:
Add an instance of your Overlay object to your root movie as “OverlayInst”.
ActionScript
Now, we need to wire it all up. Add the following to your root ActionScript. It initializes an array to store the map list, hides the Overlay and sets up mouse events for the buttons. The click event for the map buttons will show the Overlay on top, toggle off the menu and pass the chosen map back to UnrealScript:
Next, add the following InitMapList() function. This will be called by UnrealScript to pass in the map list and setup the map buttons:
function InitMapList(Param1:Array)
{
Maps = Param1;
//Show only buttons with maps
for (i=0; i<Maps.length; i++)
{
MapListMenuInst.MapListInst["MapButton"+i].ButtonText.text = Maps[i]["Name"];
MapListMenuInst.MapListInst["MapButton"+i]._visible = true;
}
}
Finally, add the ShowMapList() function to toggle the menu on/off:
function ShowMapList()
{
if (MapListMenuInst._currentframe == 1)
{
MapListMenuInst.swapDepths(_root.getNextHighestDepth());
CursorInst.swapDepths(_root.getNextHighestDepth());
MapListMenuInst.gotoAndPlay(2);
}
else
MapListMenuInst.gotoAndStop(1);
}
Republish the .swf file then open up the UDK, find the BattleMapHud package, and reimport BMHud.
BattleMapConfig.uc
Now, let’s setup a config file to store the map names. The UDK builds in configuration file functionality into the base Object class. That means that every class can implement its own config file. Mougli’s portfolio includes a very good tutorial on UDK configuration files. To sum up, any variable declared globally in a class becomes an entry in its config file.
Here’s the code for a simple object containing an array of MapItem structs:
class BattleMapConfig extends Object config(BattleMap); struct MapItem
{
var config string Name;
var config string File;
}; var config array <MapItem> Maps;
The “config(BattleMap)” directive tells the UDK that this object will read and write to a BattleMap.ini file.
DefaultBattleMap.ini
In your /UDKGame/Config directory, create a new .ini file called “DefaultBattleMap.ini” and enter the titles and file names of your maps. For example, mine looks like:
The format should look very familiar, it’s similar to DefaultInput.ini where we include new key bindings. Notice that the section heading is the name of our class.
DefaultInput.ini
Speaking of DefaultInput.ini, while we’re here go ahead and add a key binding to toggle our menu:
(In case you’re curious, the period in front of .Bindings means that duplicate entries are allowed.)
BattleMapPlayerController.uc
Here, we simply need to instantiate our new BattleMapConfig class, which will cause it to automatically initialize its variables from the config file:
var BattleMapConfig BMConfig; simulated function PostBeginPlay()
{
super.PostBeginPlay();
BMConfig = new class'BattleMapConfig';
}
BattleMapHUD.uc
Inside PostBeginPlay(), add a call to a CallInitMapList() function right after the CrosshairMovie.Initialize() statement and pass in the newly loaded Map array:
Create a new command to tell the HUD to toggle the menu and another to tell the UDK to load a new map:
exec function BMShowMapList()
{
if (WorldInfo.NetMode == NM_Standalone || WorldInfo.NetMode == NM_ListenServer)
{
BattleMapHUD(myHUD).CrossHairMovie.CallShowMapList();
}
} exec function BMOpenMap(string MapFile)
{
WorldInfo.Game.ProcessServerTravel(MapFile);
}
BattleMapGfxHud.uc
First, create two new wrapper functions for calling the HUD’s InitMapList() and ShowMapList():
function CallInitMapList( array <MapItem> Param1 )
{
ActionScriptVoid("InitMapList");
} function CallShowMapList()
{
ActionScriptVoid("ShowMapList");
}
Finally, create two receiver functions called by the HUD to execute our BMOpenMap() command and the Quit command:
function OpenMap(string MapFile)
{
ConsoleCommand("BMOpenMap " @ MapFile);
} function CloseMap()
{
ConsoleCommand("Quit");
}
That’s it! If everything went smoothly, hitting Esc will now pop up a menu of map choices. Clicking on a map name will transition to a new map. Clicking the close button will cleanly exit the UDK.
There won't be a blog post addressing a new feature this coming weekend. But I didn't want to leave you without something to play with, so I'm addressing a few questions asked in the comments:
Our friends at MonsterLayer.com gave us permission to give away the assets they created for us. Copy BattleMapItems.upk to your /UDKGame/Content/Misc directory. It includes:
Bed
Bedroll
Chair
Chest
Drawer
Ladder
Small Table
Table
Here's a couple of clips of the BattleMap in use from our last session:
And finally, according to the UDK Licensing FAQ, as long as you're not making any money off your creation you are free to package and distribute your project.
No new groundbreaking features this post. We’re going to spend this time tinkering with what we have a bit.
First order of business is fixing BMInteractObject(), which selects (picks up and drags) placeable objects. It appears to work well, except when clicking over both a map object and a HUD object. In that case, it never lets go of the HUD object. This is caused by a small bug.
Actually, the only reason it works at all is due to that bug. The code is divided into two sections: a drop and a pickup. In the drop code at the top, the switch statement checks for “CrossHairMovie” to see if the HUD has an object selected. That is incorrect, as the code checks the name of the OBJECT not the name of the CLASS. That causes the drop section to always fail for the HUD, which is actually a good thing. The code then falls to the pickup section, which calls the HUD’s InteractObject() again if a map object was not selected.
If we fix the reference in the drop section, another problem appears: the cursors never lets go of any HUD object. The HUD’s InteractObject() is self-contained with its own drop and pickup code, including a special clause to ensure it doesn’t pick up the same thing it dropped. If we try to drop and pick up in two separate calls, it always picks up what it dropped.
The easy answer was to move the call to the HUD’s InteractObject() to the top and always do it first. That’s less than ideal however, since HUD objects overlay map objects. We had to move a HUD object out of the way in order to click on a map object. So, the HUD’s InteractObject() call needs to be at the end. But what if we clicked on a map object? We passed a parameter to InteractObject() to only drop what’s selected and not select anything new.
Then it worked! And created a new problem. If we moved a map object under a HUD object, or a HUD object directly over a map object, and clicked to let go it would hot-swap between the two. We couldn’t let go unless there was nothing else to select.
The final solution is to simply do one or the other. Swapping was an interesting bit of code, but simply not feasible during gameplay. Here’s the final BMInteractObject():
BattleMapPlayerInput.uc
exec function BMInteractObject()
{
local BattleMapTorch To;
local Trigger Tr;
local int i, j, k; if (WorldInfo.NetMode == NM_Standalone || WorldInfo.NetMode == NM_ListenServer)
{
// stop doing whatever the currently selected object is doing
if (ObjectSelected != none)
{
switch(ParseObjectName(ObjectSelected.Name))
{
case "Torch":
To = BattleMapTorch(ObjectSelected);
To.StopTorch(MouseOrigin);
break;
case "GfxHud":
BattleMapHUD(myHUD).CrossHairMovie.CallInteractObject(false);
break;
}
ObjectSelected = none;
}
else
{
//start doing something with a newly selected object
switch(ParseObjectName(ObjectUnderMouse))
{
case "Torch":
foreach DynamicActors(class'BattleMapTorch', To)
if (To.Name == ObjectUnderMouse)
{
ObjectSelected = To;
To.MoveTorch();
}
break;
case "Trigger":
// activate each Kismet event attached to this trigger
foreach DynamicActors(class'Trigger', Tr)
if (Tr.Name == ObjectUnderMouse)
for (i=0; i<Tr.GeneratedEvents.Length; i++)
for (j=0; j<Tr.GeneratedEvents[i].OutputLinks.Length; j++)
for (k=0; k<Tr.GeneratedEvents[i].OutputLinks[j].Links.Length; k++)
Tr.GeneratedEvents[i].OutputLinks[j].Links[k].LinkedOp.ForceActivateInput(Tr.GeneratedEvents[i].OutputLinks[j].Links[k].InputLinkIdx);
break;
}
//if no map object found, check for a HUD object
if (ObjectSelected == none)
if(BattleMapHUD(myHUD).CrossHairMovie.CallInteractObject(true) > 0)
ObjectSelected = BattleMapHUD(myHUD).CrossHairMovie;
}
}
}
BattleMapGfxHud.uc
Add a parameter to CallInteractObject:
function int CallInteractObject(bool Param1)
ActionScript
In InteractObject(), update the definition to include the new parameter:
function InteractObject(Param1:Boolean)
And preface the loop that checks for objects under the mouse with the passed parameter:
//find new object to interact with
if (Param1)
for (var MousedObject in _root)
Finally, update the call in DeleteObject() to include the parameter:
InteractObject(true);
Now, let’s take what we’ve done with Zones and create map tokens for our monsters and players. Even though we place miniatures on the table during gameplay, it is still helpful to represent creatures within the battlemap for several reasons:
The DM doesn’t have to move around the table to reposition minis. He can move a token with a click then ask a player (or demand, depending on the DM) to move the miniature.
The DM can easily see the position of creatures without moving around for a better view. I can’t tell you how many times I’ve declared an invalid opportunity attack by an NPC, sparking a bewildered debate among the players. Or missed an opportunity attack on players, all due to my skewed view from the end of the table.
The minis are lit by whatever texture they happen to be standing on. A white token would “spotlight” the minis, despite standing on black rock, yellow stone or green goo.
Flash
Create a new token symbol within Flash. I simply made a 256x256 white circle with a black border. Don’t forget to check “Export for ActionScript”:
Next, add a block of Dynamic Text with a “P1” placeholder. Give it a variable name of “TokenText”:
You will also need to Embed the font (button next to Style). I chose only Uppercase and Numerals.
ActionScript
Add new global variables to the top:
var DefaultZoneScale:Number = 70;
var DefaultTokenScale:Number = 50;
var Tokens:Number = 0;
Add a “Token” case to the Spawn() function:
case "Token":
SpawnToken();
break;
Add the new SpawnToken() function below. It’s a separate function like SpawnZone() just to be consistent, though it didn’t need to be. SpawnZone() had additional parameters because the SwapObject() function replaced a zone by spawning a new zone with the same properties as the old one. When we swap a token, we’ll simply be changing the text.
For now, we just assign a counter to the token text. When we implement a pop-up UI within the HUD for manipulating objects, we'll pass in typed text. For now, just note the P# or M# next to the creature in your combat tracker.
We’re also ensuring that the cursor is always on top. Since a token will never need to remember what layer it was on (like swapping a zone) we just grab the highest available depth. That, of course, places it over the cursor so we need to bump that as well.
Now, update the InteractObject() function so it will grab tokens as well. We want it to work exactly the same as selecting a Zone, so we simply need to update the case statement:
case "Zone":
case "Tokn":
//find zones/tokens, but not the one we had clicked on
The same is true for the ModifyObject() function. Modifying a token will manipulate its scale just like a zone. However, we want to implement a new feature while we’re at it. If we size a token to a 1x1 square on our battlemap, it is highly likely that additional tokens will need to be that size as well. We already used the DefaultTokenScale global variable when spawning a new token, so we need to set that value here when modifying an object:
The SwapObject() function will simply update the text on the token, alternating between “P#” (PC) and “M#” (monster):
case "Tokn":
switch(_root[ObjectSelected].TokenText.substr(0, 1))
{
case "P":
_root[ObjectSelected].TokenText = "M" + _root[ObjectSelected].TokenText.substr(1);
break;
case "M":
_root[ObjectSelected].TokenText = "P" + _root[ObjectSelected].TokenText.substr(1);
break;
}
break;
Finally, let’s implement the same default scaling for zones. We've already done most of the work along the way. In SpawnZone(), change the ZoneScale variable to:
var ZoneScale = (Param5 != undefined) ? Param5 : DefaultZoneScale;
BattleMapPlayerInput.uc
Add a new case to BMSpawn():
case "Token":
BattleMapHUD(myHUD).CrossHairMovie.CallSpawn("Token");
DefaultInput.ini
Add a new key binding:
.Bindings=(Name="N",Command="BMSpawn Token")
Let’s enhance our blood decal a bit. We’ll borrow the same movement functionality as our torch and apply it to the blood decal.
BattleMapBlood.uc
Insert the following block into the BattleMapBlood class between the declaration and PostBeginPlay(). This code is nearly identical to the Torch code (we changed the names and removed the VerticalOffset that the torch light required):
var repnotify Vector BloodLoc,BloodStopLoc; replication
{
if (bNetDirty)
BloodLoc,BloodStopLoc;
} // called on clients when BloodStopLoc gets replicated
simulated event ReplicatedEvent( name VarName )
{
if (VarName == nameof(BloodLoc) )
SetLocation( BloodLoc );
else if (VarName == nameof(BloodStopLoc) )
StopBlood( BloodStopLoc );
else
super.ReplicatedEvent( VarName );
} // this function should be run on both clients and server
simulated function MoveBlood( )
{
bCollideWorld = false;
SetCollision(false, false);
GotoState( 'BloodMoving' );
} simulated function StopBlood( Vector NewBloodStopLoc )
{
bCollideWorld = true;
SetCollision(true, true);
GotoState('BloodStopped'); BloodStopLoc = NewBloodStopLoc;
SetLocation(NewBloodStopLoc);
} simulated state BloodMoving
{
simulated event Tick( float DeltaTime )
{
// move the blood...
BloodLoc = BattleMapPlayerController(Owner).MouseOrigin;
SetLocation(BloodLoc);
}
} simulated state BloodStopped
{
simulated event Tick( float DeltaTime )
{
// stop the blood...
}
}
BattleMapPlayerInput.uc
In BMInteractObject(), add a new variable:
local BattleMapBlood Bl;
Add a blood case to the “drop” switch statement:
case "Blood":
Bl = BattleMapBlood(ObjectSelected);
Bl.StopBlood(MouseOrigin);
break;
And a blood case to the “select” switch statement:
case "Blood":
foreach DynamicActors(class'BattleMapBlood', Bl)
if (Bl.Name == ObjectUnderMouse)
{
ObjectSelected = Bl;
Bl.MoveBlood();
}
break;
Next, we’ll borrow the same sizing functionality as our zones and tokens. Add the following new variable to the top:
var float DefaultBloodSize;
In BMModifyObject(), add a new local variable:
local BattleMapBlood B;
And a blood case to the switch statement. We’ll manipulate the decal’s size:
Next, update the “Blood” case in the switch statement to resize after spawning. The call to SetLocation() is simply a dirty way to force a replication:
Normally I wait until the end for the big “reveal”, but this is too cool not to show off:
Our first implementation of zones involved creating a plane object with a scripted texture. Color and text were passed to the object which would draw the text on a canvas and apply it to a Material Instance. And of course, it had the same positioning code as the torch.
However now that we’re making use of UDK’s ScaleForm UI, I thought we could pull off some pretty spectacular effects with Flash. We’re not including text (yet), but the tradeoff is worth it. Like the grid, it takes a LOT less code to implement the zones in Flash.
We’ll continue to use our existing BMSpawn, BMInteract, BMModify and BMDelete functions to start things off, but all the work will done in similar functions in ActionScript. Essentially, we’ll blindly “toss up” the commands to ActionScript and let it handle them with its own Spawn, Interact, Modify, etc.
First, let’s update our UnrealScript functions.
BattleMapGfxHud.uc
Add the following wrapper functions to BattleMapGfxHud. Note that most of these do not expect a return value. We’re just forwarding the command along. The UnrealScript code doesn’t care how ActionScript handles it. Except for InteractObject(), and all we need to know there is if we actually did click on something.
function CallSpawn(string Param1)
{
ActionScriptVoid("Spawn");
} function int CallInteractObject()
{
local int ObjectFound;
ObjectFound = ActionScriptInt("InteractObject");
return ObjectFound;
} function CallModifyObject( int Param1 )
{
ActionScriptVoid("ModifyObject");
} function CallDeleteObject()
{
ActionScriptVoid("DeleteObject");
} function CallSwapObject( int Param1 )
{
ActionScriptVoid("SwapObject");
}
BattleMapPlayerInput.uc
We need to extend our existing functions for new “zone” objects. In BMSpawn(), add this to our switch statement:
case "Zone":
BattleMapHUD(myHUD).CrossHairMovie.CallSpawn("Zone");
break;
The BMInteractObject() function tracks what we selected. In this case, we don’t necessarily know the specific item since ActionScript is handling it. So, we’ll just track that our CrossHairMovie object is selected since we know something in there is. (Yes, in hindsight, “CrossHairMovie” probably wasn’t the most appropriate name for that. Note to self: fix that later…) In the first switch statement which stops selecting, add:
case "CrossHairMovie":
BattleMapHUD(myHUD).CrossHairMovie.CallInteractObject();
ObjectSelected = none;
break;
After the next switch statement that determines what we selected, add this CallInteractObject() check. If ActionScript tells us that it selected something, then we track that the CrossHairMovie has something:
In the BMModifyObject() switch statement, pass the modifier along:
case "BattleMapGfxHu":
BattleMapHUD(myHUD).CrossHairMovie.CallModifyObject(Modifier);
break;
Yes, the case parameter is correct. The switch statement checks the first 14 characters of the object type, not the name.
Replace the entire BMDeleteObject() function with the code below. We need to add an “object deleted?” check throughout the function. Since it would be easier to click inside a large zone than a torch, we want to track if we actually deleted an UnrealScript object first so that we don’t accidently delete multiple items in both UnrealScript and ActionScript. If nothing was found, then we pass the command along:
exec function BMDeleteObject()
{
local BattleMapTorch To;
local BattleMapBlood Bl;
local bool ObjectDeleted; if (WorldInfo.NetMode == NM_Standalone || WorldInfo.NetMode == NM_ListenServer)
{
ObjectDeleted = false;
switch(ParseObjectName(ObjectUnderMouse))
{
case "Torch":
foreach DynamicActors(class'BattleMapTorch', To)
if (To.Name == ObjectUnderMouse)
{
To.Destroy();
ObjectDeleted = true;
}
break;
case "Blood":
foreach DynamicActors(class'BattleMapBlood', Bl)
if (Bl.Name == ObjectUnderMouse)
{
Bl.Destroy();
ObjectDeleted = true;
}
break;
}
if (!ObjectDeleted)
BattleMapHUD(myHUD).CrossHairMovie.CallDeleteObject();
}
}
Finally, add a new BMSwapObject() function. Our ModifyObject() function increases an item’s size, for example, but BMSwapObject() will exchange it for something else. Like different blood decals, or a sunrod in place of a torch, or different types of zones:
exec function BMSwapObject(int Modifier)
{
if (WorldInfo.NetMode == NM_Standalone || WorldInfo.NetMode == NM_ListenServer)
{
if (ObjectSelected != none)
{
switch(Left(ObjectSelected, 14))
{
case "BattleMapGfxHu":
BattleMapHUD(myHUD).CrossHairMovie.CallSwapObject(Modifier);
break;
}
}
}
}
DefaultInput.ini
We need three more keybindings for spawning a zone and swapping an object:
Now, something new. The zones are three layered images rotating in different directions animated in Flash. The runic circles themselves are brushes from Obsidian Dawn. At the bottom of their page, they provide instructions for importing and using the brushes. Essentially, we:
Created three layers in a transparent image
Chose a color
Painted a large, medium and small runic circle on its own layer
Align the circles
Crop and resize the image to a power of 2 (256x256, 512x512, etc.)
Save as PNG into the .\UDKGame\Flash\BMHud\BMHud folder along with the cursor
Flash
To get the circles animating, import the individual images into Flash. Don’t forget to update the properties of each PNG file to “Lossless (PNG/GIF)” Compression, otherwise they won’t import into the UDK:
Next, create a new Symbol. Just as in Photoshop/Gimp, create three layers and put a rune image in each later. (If you lined them up correctly before cropping/saving earlier, then here you simply need to stack them perfectly on top of each other. If not, you can still make fine adjustments here.)
Insert a frame way out on the timeline for however long you want the animation to run. Ours goes 360 frames, which is 15 seconds at 24 fps. We didn’t want to cause epileptic seizures with fast spinning circles. Create a motion tween on each later, setting the number of rotations and the direction:
Once you’re done creating your runic circle, edit the symbol’s properties in the library:
Enable “Export for ActionScript”
Enable “Export in frame 1”
Enter an identifier. Ours are CircleXXX. (CircleBlue, CircleGreen, CircleRed, etc.)
ActionScript
Once you’re done creating all your circles, we just need to add object manipulation functions to ActionScript. First, a simple Spawn function:
function Spawn(Param1:String)
{
switch(Param1)
{
case "Zone":
SpawnZone();
break;
}
}
Next, a function to create a zone. This function will perform a double duty. It will create a brand new zone, as well as replace an existing one. It does that by creating a zone at the same level as an existing one. (Flash allows one movieclip per level.) So, the function accepts input parameters to predefine a zone’s color and shape, or sets defaults if none are provided.
To keep things simple, we’re also performing some slight-of-hand with the movieclip’s properties. We need to track two things: which symbol this zone is using and what level it’s on. Rather than creating a custom class to extend movieclip for two properties, we’re going to appropriate existing properties. We’ll attach the level to the zone’s name (since both the level and the name need to be unique anyway, it seemed a good fit), and store the type of symbol in the taborder property.
“Wait, what?” Yeah, that’s kinda tricky. Flash doesn’t provide a property to determine what linkage type a symbol instance was created from. So, we’ll store our linkage names in an array then save the individual index in the taborder property – also an integer value. Which as it turns out, makes it easy to swap instances since we simply need to rotate the index number:
var Zones:Array = Array("CircleBlue", "CircleGreen", "CirclePurple", "CircleRed", "CircleYellow"); // Param1:Name, Param2:Index, Param3:x, Param4:y, Param5:scale
function SpawnZone(Param1:String, Param2:Number, Param3:Number, Param4:Number, Param5:Number)
{
var ZoneName = (Param1 != undefined) ? Param1 : GetNextZone();
var ZoneIndex = (Param2 != undefined) ? Param2 : Math.floor(Math.random() * Zones.length);
var ZoneX = (Param3 != undefined) ? Param3 : _root._xmouse;
var ZoneY = (Param4 != undefined) ? Param4 : _root._ymouse;
var ZoneScale = (Param5 != undefined) ? Param5 : 70;
var ZoneLevel = int(ZoneName.substr(4)); var z1 = _root.attachMovie(Zones[ZoneIndex], ZoneName, ZoneLevel);
z1._x = ZoneX;
z1._y = ZoneY;
z1.tabIndex = ZoneIndex;
z1._xscale = ZoneScale;
z1._yscale = ZoneScale;
} function GetNextZone()
{
var LastZone:Number = 1;
for (var RootObject in _root)
if (RootObject.substr(0, 4) == "Zone")
LastZone = (int(RootObject.substr(4)) > LastZone) ? int(RootObject.substr(4)) : LastZone;
return "Zone" + (LastZone + 1);
}
Implement the InteractObject() function to handle clicking an item. This works exactly like its UnrealScript counterpart. On each mouse click it first stops interacting with whatever may be currently selected, then tries to find a new item to select:
var ObjectSelected:String; function InteractObject()
{
var PrevObjectSelected:String;
//stop Interacting with existing object
if (ObjectSelected.length > 0)
{
DragObject("");
PrevObjectSelected = ObjectSelected;
ObjectSelected = "";
}
//find new object to interact with
for (var MousedObject in _root)
{
if (_root[MousedObject].hitTest(_root._xmouse, _root._ymouse, false))
{
switch (_root[MousedObject]._name.substr(0, 4))
{
case "Zone":
//find zones, but not the one we had clicked on
if (_root[MousedObject]._name != PrevObjectSelected)
{
ObjectSelected = _root[MousedObject]._name;
}
break;
}
}
if (ObjectSelected.length > 0)
{
DragObject(MousedObject);
return 1;
}
}
return 0;
}
When moving torches in UnrealScript, we set the object to either a moving or stationary state. The moving state updated itself every tick to the mouse’s position. Here, we can let Flash do all the work. Just like our custom cursor, we tell Flash to drag around our symbol. Flash will only drag one item at a time, so we hide our cursor symbol and reattach it when we’re not dragging something else:
ModifyObject(), again, works just like the UnrealScript version. It determines what’s selected, then takes an appropriate action. For a zone, we modify the scale:
function ModifyObject(Param1:Number)
{
if (ObjectSelected.length > 0)
{
switch(ObjectSelected.substr(0, 4))
{
case "Zone":
_root[ObjectSelected]._xscale *= (1 + (0.1 * Param1));
_root[ObjectSelected]._yscale = _root[ObjectSelected]._xscale;
break;
}
}
}
DeleteObject() first calls InteractObject() to see if there’s something under the mouse to delete. If so, delete it, then start dragging the cursor again:
function DeleteObject()
{
InteractObject();
if (ObjectSelected.length > 0)
{
_root[ObjectSelected].removeMovieClip();
DragObject();
}
}
Finally, a new function SwapObject(). This will swap an existing zone for another. It simply records the properties of the selected zone then passes those to SpawnZone(). Since it’s inserted at the same level, Flash removes the old one for us. The modifier we pass in determines which direction we loop through the array of linkage names:
function SwapObject(Param1:Number)
{
if (ObjectSelected.length > 0)
{
switch(ObjectSelected.substr(0, 4))
{
case "Zone":
var ZoneID:Number = _root[ObjectSelected].tabIndex;
ZoneID += Param1;
ZoneID = (ZoneID >= Zones.length) ? 0 : ZoneID;
ZoneID = (ZoneID < 0) ? Zones.length - 1 : ZoneID;
Now, fire up the UDK Editor and reimport your BMHud SwfMovie. Make sure the package also imported all your circle images. I’m not sure when it was fixed, but the FrontEnd is now smart enough to detect the updated package so you shouldn’t have to manually copy it into the CookedPC folder.
Last but not least, by request, a way to toggle the debug text.